| Source: http://www.tutorialman.com/tutorials/customize_color_of_car/ In this tutorial you will learn to convert an image of ordinary car to colorful one after making necessary editing in photoshop. Follow the steps as shown below: |
| 1) Select an image of a car as shown in Figure 1. |
 |
| Figure 1. |
| 2) Let us select polygon lasso tool as shown in Figure 2. |
 |
| Figure 2. |
| 3) Now let us select the bumper with the help of polygon lasso tool as shown in Figure 3. |
 |
| Figure 3. |
| 4) Now keeping the bumper selected right click inside the image and click on Layer via Copy. This will duplicate the image in to a new layer. Now we go to Edit - Free transform and let us lengthen the image so that the front bumper height has increased as shown in Figure 4. |
 |
| Figure 4. |
Showing posts with label design. Show all posts
Showing posts with label design. Show all posts
Sunday, May 11, 2008
Photoshop Tutorial: Pimp the color of a car image using photoshop
Saturday, May 3, 2008
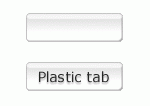
Photoshop Tutorial: Plastic Tab
Source: http://www.absolutecross.com/tutorials/photoshop/interfaces/plastic-tabs/1.) Start with a new image about 400×400 px with a white background. Create a new layer and using the Rectangular Marquee tool draw a rectangle roughly the size of the example below।
2.) Click the Channels tab to enter the Channels Palette, and create a New Channel. Fill the selection in with white, then deselect (CTRL+D). Now go to Filter » Blur »Gaussian Blur and use a setting of about 3.5, then click OK. Next go to Image » Adjust » Levels and drag the two bottom triangles towards the center until the button looks nice and smooth (see image)। Click OK when done. Hold CTRL and click on the channel “Alpha 1″ to select it, then click the Layers Tab. Do not lose the selection.
3.) Set your foreground color to: R:212 G:214 B:212 and the background to white. Now, using the Linear Gradient tool (foreground to background), drag from the top of the selection to the bottom, so that it looks similar to the example below. Now create a New Layer and set your foreground color to R:192 G:192 B:192. Go to Edit » Stoke - for width choose 1 pixel and for location choose Center। Do not deselect yet.
4.)Now, with the Rectangular Marquee tool selected, move the selection up to the top of the button so that it overlaps slightly (see picture). Now create a new layer and fill that selection in with white. Click on the Channels palette, hold CTRL and click on “Alpha 1″ to load the selection. Click the Layers tab and now go to Select » Inverse. Hit delete. press CTRL+D to deselect. Now go to Filter » Blur » Guassian Blur and use a setting of 0।3. Click OK and set the Opacity of that layer down to 74.
5.) It should be looking pretty good at this point, but to add to the effect add a drop shadow to the layer with the original button shape on it (Layer 1). Also go to Layer » Effects » Inner Shadow and use the settings shown in the image below। You should now have a nice plastic tab ready to add some text to.
6.) Select the Type Tool and add some text to your button. To give the text some extra depth, you can also add a very faint drop shadow to the text itself for a nice effect. To change the color go to Image » Adjust » Hue/Saturation।
7।) Apply the same tutorial to other shapes - you’ll get some neat effects.

Labels:
adobe,
design,
editing,
graphics,
photoshop,
plastic tab,
trend,
web 2.0,
web design
Subscribe to:
Posts (Atom)


